Showing posts with label MikroC. Show all posts

Sunday, November 5, 2023

Scrolling text on Dot-Matrix Using PIC controller & MikroC Pro


Scrolling text on Dot-Matrix Using PIC controller & MikroC Pro

Scrolling text on Dot-Matrix Using PIC controller & MikroC Pro

 Dot Matrix is the combination of LEDs in Matrix form in different sizes. Dot Matrix LED display use to display any type of text on it, but on 7 segment we can display digits only. We can see the Dot Matrix Display in marketing for advertising and in other different application to display some text.

Related Topic: 

So here we are sharing the scrolling text on dot matrix. MikroC Pro for PIC is use for coding and compilation and Proteus 8.15 is use for simulation for circuit testing.

Dot-Matrix concept:

Dot Matrix PINOUT

Working of dot matrix:

Here we are using common cathode dot matrix, it means the Anodes of the LEDs are common with columns and cathode with rows as you can see in above 1st diagram.

If we want to ON top left dot, then we will do column 1 high and row 1 low. Here if we will scan columns and row 1 low all others row at high then top row of the matrix will glow one by one from left to right. Wise versa if we scan rows and select to high one column then selected column dots glow one by one.

Interesting this is that if we increase the scanning speed and cross the human eye flickering sensitivity then we see a line of row or column.

Circuit diagram:

Circuit designed in Proteus8.15

Scrolling text on Dot-Matrix Using PIC controller & MikroC Pro

MikroC Pro for PIC Coding:

/// Dot Matrix 5x7 using PIC ///
/// by Elektronics Garage    ///
/// Date: 4 Nov 2023         ///

//Dot_Matrix size
unsigned int columns = 10;
unsigned int rows = 7;
unsigned int loop=0;
unsigned int col=0;
unsigned int row=0;
int int i,j;
unsigned int col_num[] = {0x01,0x02,0x04,0x08,0x10,0x01, 0x02, 0x04, 0x08, 0x10};
unsigned int row_A[] = {0x01, 0x76, 0x76, 0x76,0x01,0xFF,0xFF,0xFF,0xFF,0xFF};
unsigned int row_B[] = {0x00, 0x36, 0x36, 0x36,0x49,0xFF,0xFF,0xFF,0xFF,0xFF};

void main() {
TRISB=0x00;
TRISD=0x00;
PORTB=0x00;
PORTD=0x00;

col=columns-1; 

while(1) {

for (j=0;j<300 delay_us="" else="" for="" i="" if="" j="" loop="" portb="col_num[col-i];" portd="row_A[row];" row="loop;">col-1){loop=0;}
}
}
Read More

Sunday, October 29, 2023

Interface 7 Segment 4x1 with PIC controller using PIC controller

Interface 7 Segment 4x1 with PIC controller using PIC controller

Interface 7 Segment 4x1 with PIC controller using PIC controller

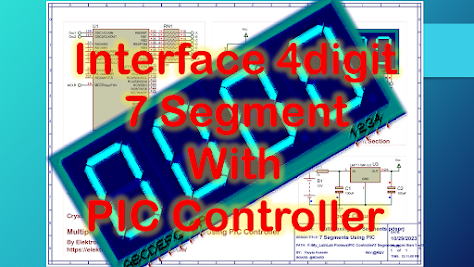
7 Segment display use to display the values in form of digits. So it’s important to learn 7 segment and how to drive single 7 segment using different controllers and that code programs in different compilers. The basic Concept remain same. So here we are going to drive 4 digit 7 segment using PICcontroller and compile it working code in MikroC pro for PIC.

After coding compilation its important to test it on circuit so we use Proteus 8.15 for simulation.

For types of 7 segments see this topic:7 Segment Interfacewith PIC Microcontroller as Up Counter

4 digit 7 segment in Proteus:

4 Digit 7 Segment
4 Digit 7 Segment


PINOUT of 4 digit 7 segment:

4 Digit 7 Segment Pinout

Example to Display the 4 digits value:

1234 is value for example:

4 is at unit position

3 is at 10th position

2 is at 100th position and

1 is at 1000th position

When we will display 4 then we select unit digit by using pin DG1 and send the data of 4 (in form of binary which drive the 7 segment)

See this table:

Digit

Dp

G

F

E

D

C

B

A

Hex

0

0

0

1

1

1

1

1

1

0x3F

1

0

0

0

0

0

1

1

0

0x06

2

0

1

0

1

1

0

1

1

0x5B

3

0

1

0

0

1

1

1

1

0x4F

4

0

1

1

0

0

1

1

0

0x66

5

0

1

1

0

1

1

0

1

0x6D

6

0

1

1

1

1

1

0

1

0x7D

7

0

0

0

0

0

1

1

1

0x07

8

0

1

1

1

1

1

1

1

0x7F

9

0

1

1

0

1

1

1

1

0x6F


And we are using decoder 74LS138 Mux IC to select the 7 segment digits and saving the pins of controller. We are using Just for 4 output control red blocked area of the table.


74LS138 Decoder IC

When we will display 3 then we select 10th digit by using pin DG2 and send the data of 3.

When we will display 2 then we select 100th digit by using pin DG3 and send the data of 2.

When we will display 1 then we select 1000th digit by using pin DG4 and send the data of 1.

Circuit Diagram:

Interface 7 Segment 4x1 with PIC controller using PIC controller

MikroC coding:
/// Multiplexed 7 Segments ///
/// Eleltronics Garage     ///
/// By: Fayyaz Hussain     ///
///   29 Oct, 2023         ///

int count=0;
void counter();

int up_pr=0,down_pr=0,digit1=0,digit2=0,digit3=0,digit4=0;

// Array of 7 Segment display decoder
unsigned int seg_num[]={0x3F,0x06,0x5B,0x4F,0x66,0x6D,0x7D,0x07,0x7F,0x6F};

sbit up at RD4_bit;  // Up count Button
sbit down at RD5_bit;// Down count Button
sbit rst at RD6_bit; // Reset to 0 button

sbit A at RD0_bit; // Decoder 74LS138 IC INPUT A,B
sbit B at RD1_bit; //

void main() {
TRISB=0x00;
TRISD=0xF0;
PORTB=0x00;
PORTD=0x00;

while(1)
     {// UP counting using Falling Edge
      if(up==1){up_pr++;}
      if(up==0 && up_pr>=1){count++;up_pr=0;}
      
      // DOWN counting using Falling Edge
      if(down==1){down_pr++;}
      if(down==0 && down_pr>=1){if(count>0){count--;}
                               down_pr=0;}
            
      if (rst==1){count=0;} // Reset the counter

counter(); // function to define digits position
     // Unit position Digit
     B=0;A=0;
     PORTB=seg_num[digit1];
     Delay_ms(2);
     // 10th position digit
     B=0;A=1;
     PORTB=seg_num[digit2];
     Delay_ms(2);
     // 100th position Digit
     B=1;A=0;
     PORTB=seg_num[digit3];
     Delay_ms(2);
     // 1000th position Digit
     B=1;A=1;
     PORTB=seg_num[digit4];
     Delay_ms(2);
     }
}

void counter()
{
digit1 = count%10;
digit2 = (count%100)/10;
digit3 = (count%1000)/100;
digit4 = count/1000;
}
Read More

Important Artical

Popular Articals

Total Page views in This Month

© 2019-20 Electronics Garage. Designed by Uzma 0101 & Distributed by elektronicsgarage1.blogspot.com