Showing posts with label 7 Segment. Show all posts

Sunday, November 26, 2023

The falling edge detection code Using PIC16F877A and MikroC Compiler

The falling edge detection code for PIC16F877A and MikroC Compiler

The falling edge detection code Using PIC16F877A and MikroC Compiler

Edge activation is very important for counting or any enabling application. so here we are going to discuss falling edges to activate or detect the falling edges. This is a very important example we are sharing with all.
counter count on falling edge (press the button it will not count but when the button is released then counter increment or decrement depending on the application.

Related topic:

I have discussed the falling edge issue in this topic too, but the given topic is on Multiplexing of 7 segments.

Falling edge detection is very tough for electronic players so we are going to solve this problem in coding by using the compiler MikroC pro for PIC16F877A and Simulate it on Proteus 8.15 for testing.

What is Falling Edge?

The falling edge of the clock means that when the clock pulse goes to low from high level that makes high to low a shorter time edge. You can be seen here in the diagram as illustrated.

falling edge of the clock

On the way, we will also discuss the multi-press problem solution for the button here. 

What multi-press of buttons?

For example, we have created a counter application circuit using a PIC microcontroller and wrote the code to Count up when the push button is pressed. here is the problem when we write a simple code. we press one time but the microcontroller reads it many times and the counter scrolls up many numbers with a single click.

Code chunk example:

while(1){
if (button ===1){
counter++;
Lcd_Out(1,1,counter);
}
}

Multipress Problem:

In starting coding experiments I used delay before counter++  to solve this problem but it was not as practical as I wanted or you wanted to. then I have to use a method that works perfectly on the edges of the clock and also resolve the multipress problem.
Here we are sharing with you all. 

See the results here using Proteus 8.15 Simulations:

Proteus Oscilloscope


Circuit Diagrams

The falling edge detection code for PIC16F877A and MikroC Compiler

You can download the circuit in PDF format:
 

MikroC Coding Chunk:

while(1)
     {// UP counting using Falling Edge
      led=0;
      if(up==1){up_pr++;}
       // Here is a technique when we press the button then
       // increment in an int variable
      if(up==0 && up_pr>=1)
      // Now here apply the condition when (button depress
      // and up_pr>=1) then apply the action function as under
        {count++;led=1;Delay_ms(100);up_pr=0;}

      // DOWN counting using Falling Edge
      if(down==1){down_pr++;}
      if(down==0 && down_pr>=1){if(count>0){count--;}
                               down_pr=0;}

      if (rst==1){count=0;} // Reset the counter

So by this, I have Solve the Problem ..... Enjoy

Happy Emoji


Read More

Sunday, October 29, 2023

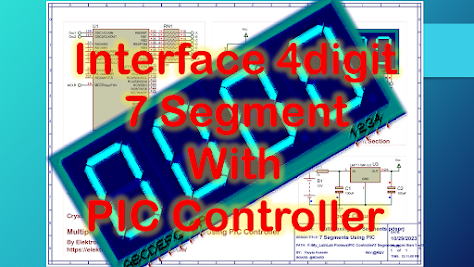
Interface 7 Segment 4x1 with PIC controller using PIC controller

Interface 7 Segment 4x1 with PIC controller using PIC controller

Interface 7 Segment 4x1 with PIC controller using PIC controller

7 Segment display use to display the values in form of digits. So it’s important to learn 7 segment and how to drive single 7 segment using different controllers and that code programs in different compilers. The basic Concept remain same. So here we are going to drive 4 digit 7 segment using PICcontroller and compile it working code in MikroC pro for PIC.

After coding compilation its important to test it on circuit so we use Proteus 8.15 for simulation.

For types of 7 segments see this topic:7 Segment Interfacewith PIC Microcontroller as Up Counter

4 digit 7 segment in Proteus:

4 Digit 7 Segment
4 Digit 7 Segment


PINOUT of 4 digit 7 segment:

4 Digit 7 Segment Pinout

Example to Display the 4 digits value:

1234 is value for example:

4 is at unit position

3 is at 10th position

2 is at 100th position and

1 is at 1000th position

When we will display 4 then we select unit digit by using pin DG1 and send the data of 4 (in form of binary which drive the 7 segment)

See this table:

Digit

Dp

G

F

E

D

C

B

A

Hex

0

0

0

1

1

1

1

1

1

0x3F

1

0

0

0

0

0

1

1

0

0x06

2

0

1

0

1

1

0

1

1

0x5B

3

0

1

0

0

1

1

1

1

0x4F

4

0

1

1

0

0

1

1

0

0x66

5

0

1

1

0

1

1

0

1

0x6D

6

0

1

1

1

1

1

0

1

0x7D

7

0

0

0

0

0

1

1

1

0x07

8

0

1

1

1

1

1

1

1

0x7F

9

0

1

1

0

1

1

1

1

0x6F


And we are using decoder 74LS138 Mux IC to select the 7 segment digits and saving the pins of controller. We are using Just for 4 output control red blocked area of the table.


74LS138 Decoder IC

When we will display 3 then we select 10th digit by using pin DG2 and send the data of 3.

When we will display 2 then we select 100th digit by using pin DG3 and send the data of 2.

When we will display 1 then we select 1000th digit by using pin DG4 and send the data of 1.

Circuit Diagram:

Interface 7 Segment 4x1 with PIC controller using PIC controller

MikroC coding:
/// Multiplexed 7 Segments ///
/// Eleltronics Garage     ///
/// By: Fayyaz Hussain     ///
///   29 Oct, 2023         ///

int count=0;
void counter();

int up_pr=0,down_pr=0,digit1=0,digit2=0,digit3=0,digit4=0;

// Array of 7 Segment display decoder
unsigned int seg_num[]={0x3F,0x06,0x5B,0x4F,0x66,0x6D,0x7D,0x07,0x7F,0x6F};

sbit up at RD4_bit;  // Up count Button
sbit down at RD5_bit;// Down count Button
sbit rst at RD6_bit; // Reset to 0 button

sbit A at RD0_bit; // Decoder 74LS138 IC INPUT A,B
sbit B at RD1_bit; //

void main() {
TRISB=0x00;
TRISD=0xF0;
PORTB=0x00;
PORTD=0x00;

while(1)
     {// UP counting using Falling Edge
      if(up==1){up_pr++;}
      if(up==0 && up_pr>=1){count++;up_pr=0;}
      
      // DOWN counting using Falling Edge
      if(down==1){down_pr++;}
      if(down==0 && down_pr>=1){if(count>0){count--;}
                               down_pr=0;}
            
      if (rst==1){count=0;} // Reset the counter

counter(); // function to define digits position
     // Unit position Digit
     B=0;A=0;
     PORTB=seg_num[digit1];
     Delay_ms(2);
     // 10th position digit
     B=0;A=1;
     PORTB=seg_num[digit2];
     Delay_ms(2);
     // 100th position Digit
     B=1;A=0;
     PORTB=seg_num[digit3];
     Delay_ms(2);
     // 1000th position Digit
     B=1;A=1;
     PORTB=seg_num[digit4];
     Delay_ms(2);
     }
}

void counter()
{
digit1 = count%10;
digit2 = (count%100)/10;
digit3 = (count%1000)/100;
digit4 = count/1000;
}
Read More

Important Artical

Popular Articals

Total Page views in This Month

© 2019-20 Electronics Garage. Designed by Uzma 0101 & Distributed by elektronicsgarage1.blogspot.com